
The Scheduler is a powerful tool that allows organizers to manually manage and control meeting schedules. This feature is available when the Scheduling Mode is set to Organizers, giving full control over when and how meetings are arranged. Learn more about different scheduling modes in our article Scheduling and request mode.
While participants can always view their meetings, the specific meeting details, such as the date, time, and location, are only visible once the organizer publishes the schedule.
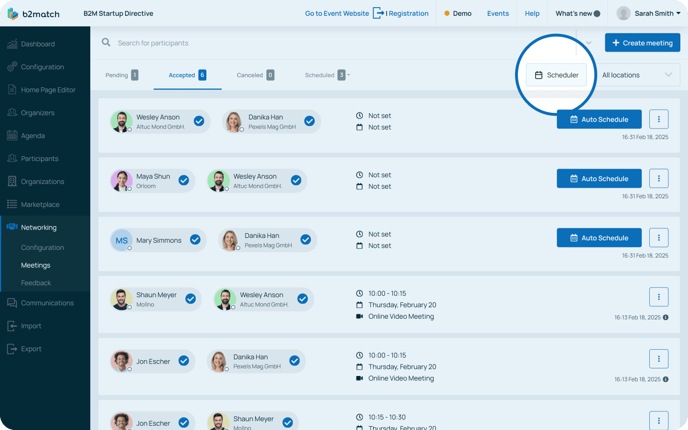
How do I access the Scheduler?
To begin scheduling meetings, first click on Networking on the left sidebar of the Organizer's tool and then select Meetings.
This will open the Meetings list page.

Here, click on Accepted to view all confirmed meetings that are ready to be scheduled.

To open scheduling options, click on the Scheduler button in the upper right corner.
Scheduler Options Explained
1. Schedule All Meetings
The Schedule All option automatically schedules all accepted but unscheduled meetings. This streamlines the scheduling process by handling all meetings at once.

Note: If all meetings are already scheduled, this option will be disabled.
2. Unschedule All Meetings
The Unschedule All option removes all scheduled meetings and moves them back to the accepted state without a specified meeting date & time, allowing organizers to make adjustments.

Note: If all meetings are already unscheduled, this option will be disabled.
3. Publish/Unpublish Schedule
Once you have scheduled all accepted meetings, it is time to share the information with your participants by clicking on Publish schedule.
Once published, all scheduled meeting details—including the date, time, and location—become visible to the participants.
If you wish to make some changes to the schedule, first unpublish the schedule. This will keep meeting details hidden from participants and allows you to make necessary changes.

4. Auto schedule selected meetings
In addition to scheduling all meetings in bulk, you can choose to automatically schedule only specific meetings.
To do this, go to the Accepted tab on the Meeting List page, find the meeting you want to schedule, and click the Auto Schedule button next to it.
This will automatically schedule the selected meeting.

If you didn't find an answer to your questions, please get in touch with the Support Team here.