A tailored registration form is one of the most valuable assets you have as an organizer. It ensures the first step of your participants’ event journey starts smoothly and that you collect all necessary information from their first touchpoint.
The b2match registration form builder allows you to create tailored forms both for participants and organizations. In this article, we will explain how to edit the participant registration form to suit your needs and collect the right information.
How can I manage the participant form?
The main content area is the place where you rearrange, add, or delete registration fields.
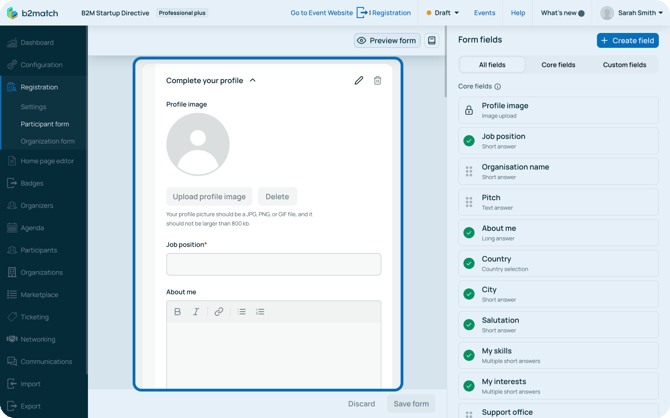
The registration form works on the drag and drop principle.
To reorder a field, simply click it, hold, and drag it to the desired place.
To add a new field to the registration form, find it in the Form fields list on the right sidebar, then click, hold, and drag it to the desired spot in the main content area.
This principle works both for core fields and custom fields. Learn more about configuring custom fields in our article Creating & editing custom fields.
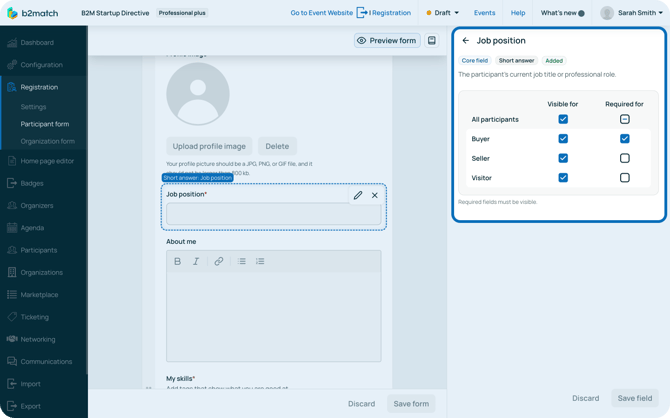
How can I edit a core field?
Core fields are system-defined and offer limited editing capabilities compared to custom fields.
You can configure the core fields by deciding which participant types the field will be visible and required for.
To configure the field, first find it in the All fields or Core fields right sidebar.
Next, hover over it and click on the pencil (Edit) icon.

Then, simply tick the checkboxes to set visibility and required status for the desired participant type. If the setting applies to all, use the All participants checkbox.
Tip: After you are done editing the registration form, don’t forget to click on the Save form button to keep your changes.
How can I remove a field from the registration form?
To remove a field from the registration form, hover over the field in the main preview, and click on the x (Delete) icon next to it. 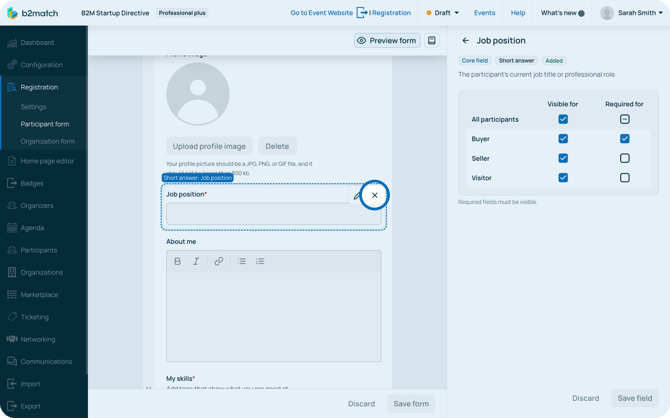
Keep in mind that you can always see which fields are included in the registration form. In the Form fields sidebar, a green checkmark next to a field means it is currently included in the form.
If a field has a checkmark but is on a white background, it means the field is included in the form but is not visible to all participant types.
If a field doesn’t have a checkmark but instead has 6 dots next to it, it means the field is not included in the form. 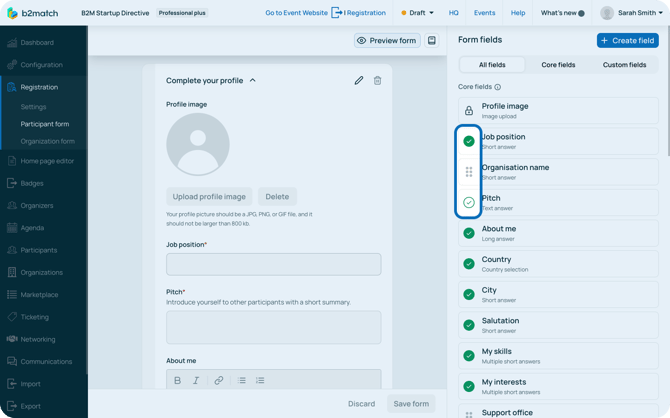
How can I add a new step to the registration?
You can break the form into several steps to make it easier for participants to fill it out and to avoid overwhelming them.
To do this, simply scroll down to the last field you added to the registration form. Below it, you will see Add step. 
Click on Add step. This will open the Create new step modal.
Here, write the name of the registration step and add a description for it. 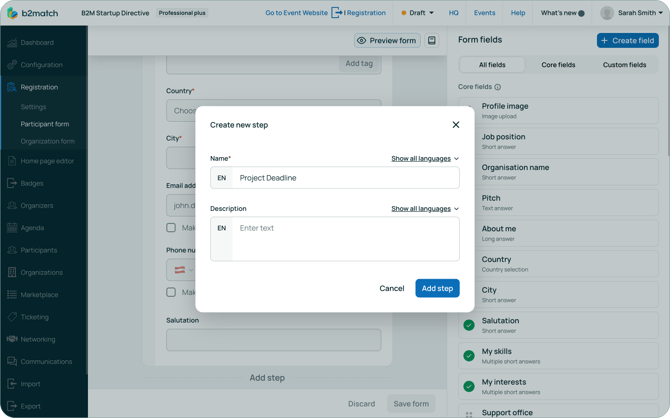
Note: Keep in mind that if you have a multilingual event, you will need to configure the content in multiple languages.
Then, click on the Add step button.
You can edit the name and description of the step by clicking on the pencil icon or deleting it by clicking on the bin icon.
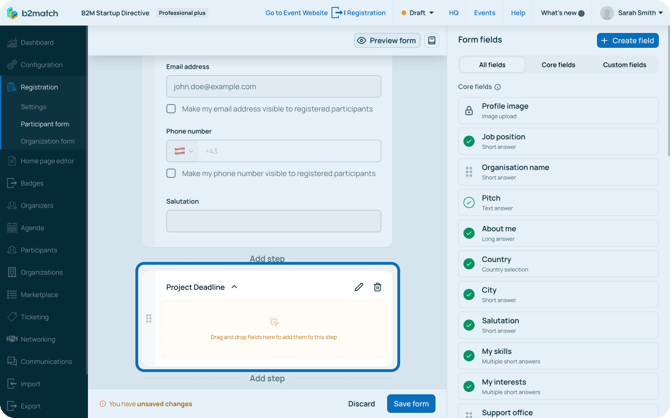
Note: Remember to drag fields into your new step, or it will appear as an empty page during registration.
How can I preview the participant form?
You can at any time preview how the registration form will look like for your participants.
Note: Keep in mind that you save your changes by clicking on the “Save form” button, to ensure all your desired fields are shown up in the registration form.
To preview how your participants will see the form, click on the Preview form button in the upper right corner of the Main content area. 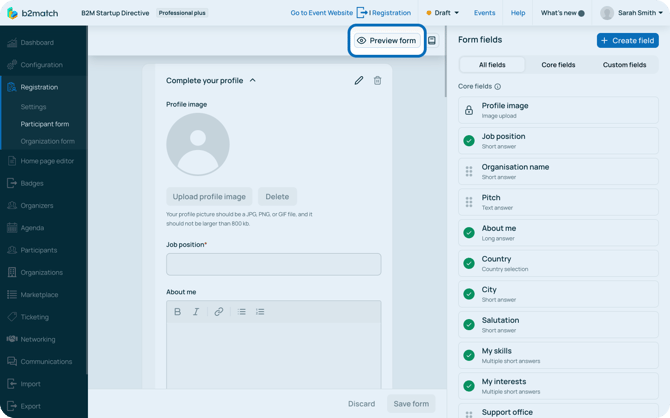
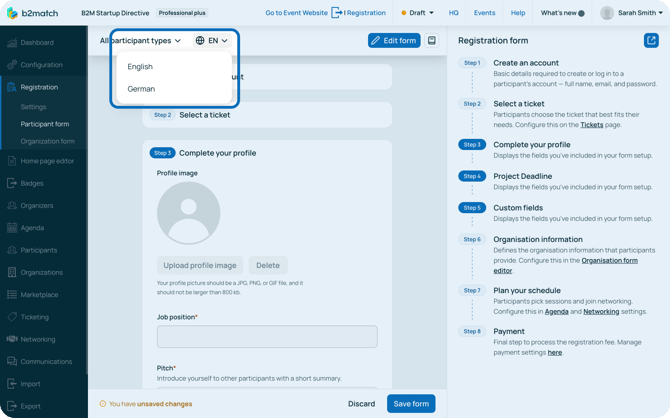
To preview the form as a specific participant type, select it from the dropdown in the upper-left corner.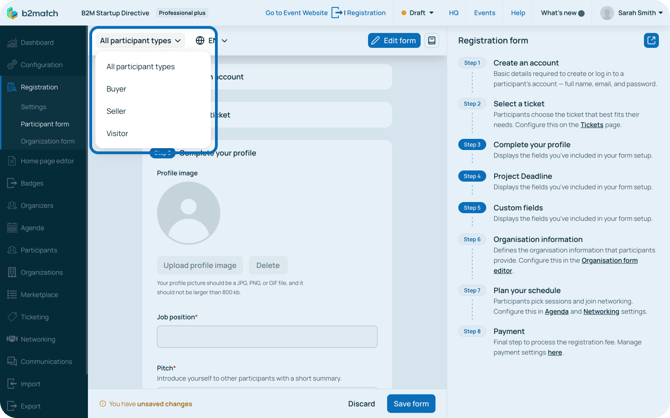
If your event is multilingual, you can also preview the registration in the different languages of your event. To do this, simply select the language from the drop-down.
On the left side you will see how the registration will look in full with all the steps included.
If you wish to see a full preview of the registration as it will appear on the website, click the Preview icon at the top of the right sidebar or the Registration button in the main header.
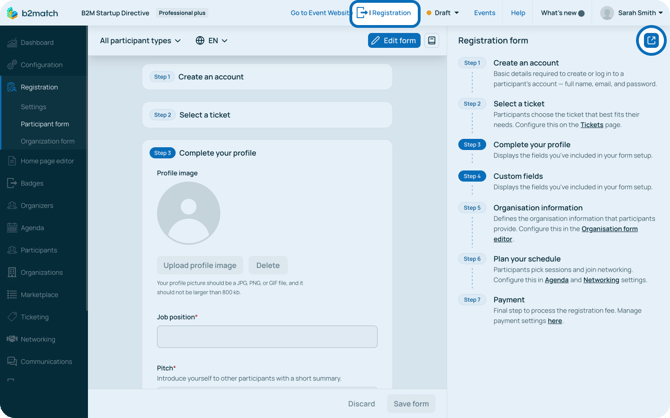
To go back to editing the form, simply click on the Edit form button and continue editing the form.
If you didn't find an answer to your questions, please get in touch with the Support Team here.